Friday, 8 August 2025
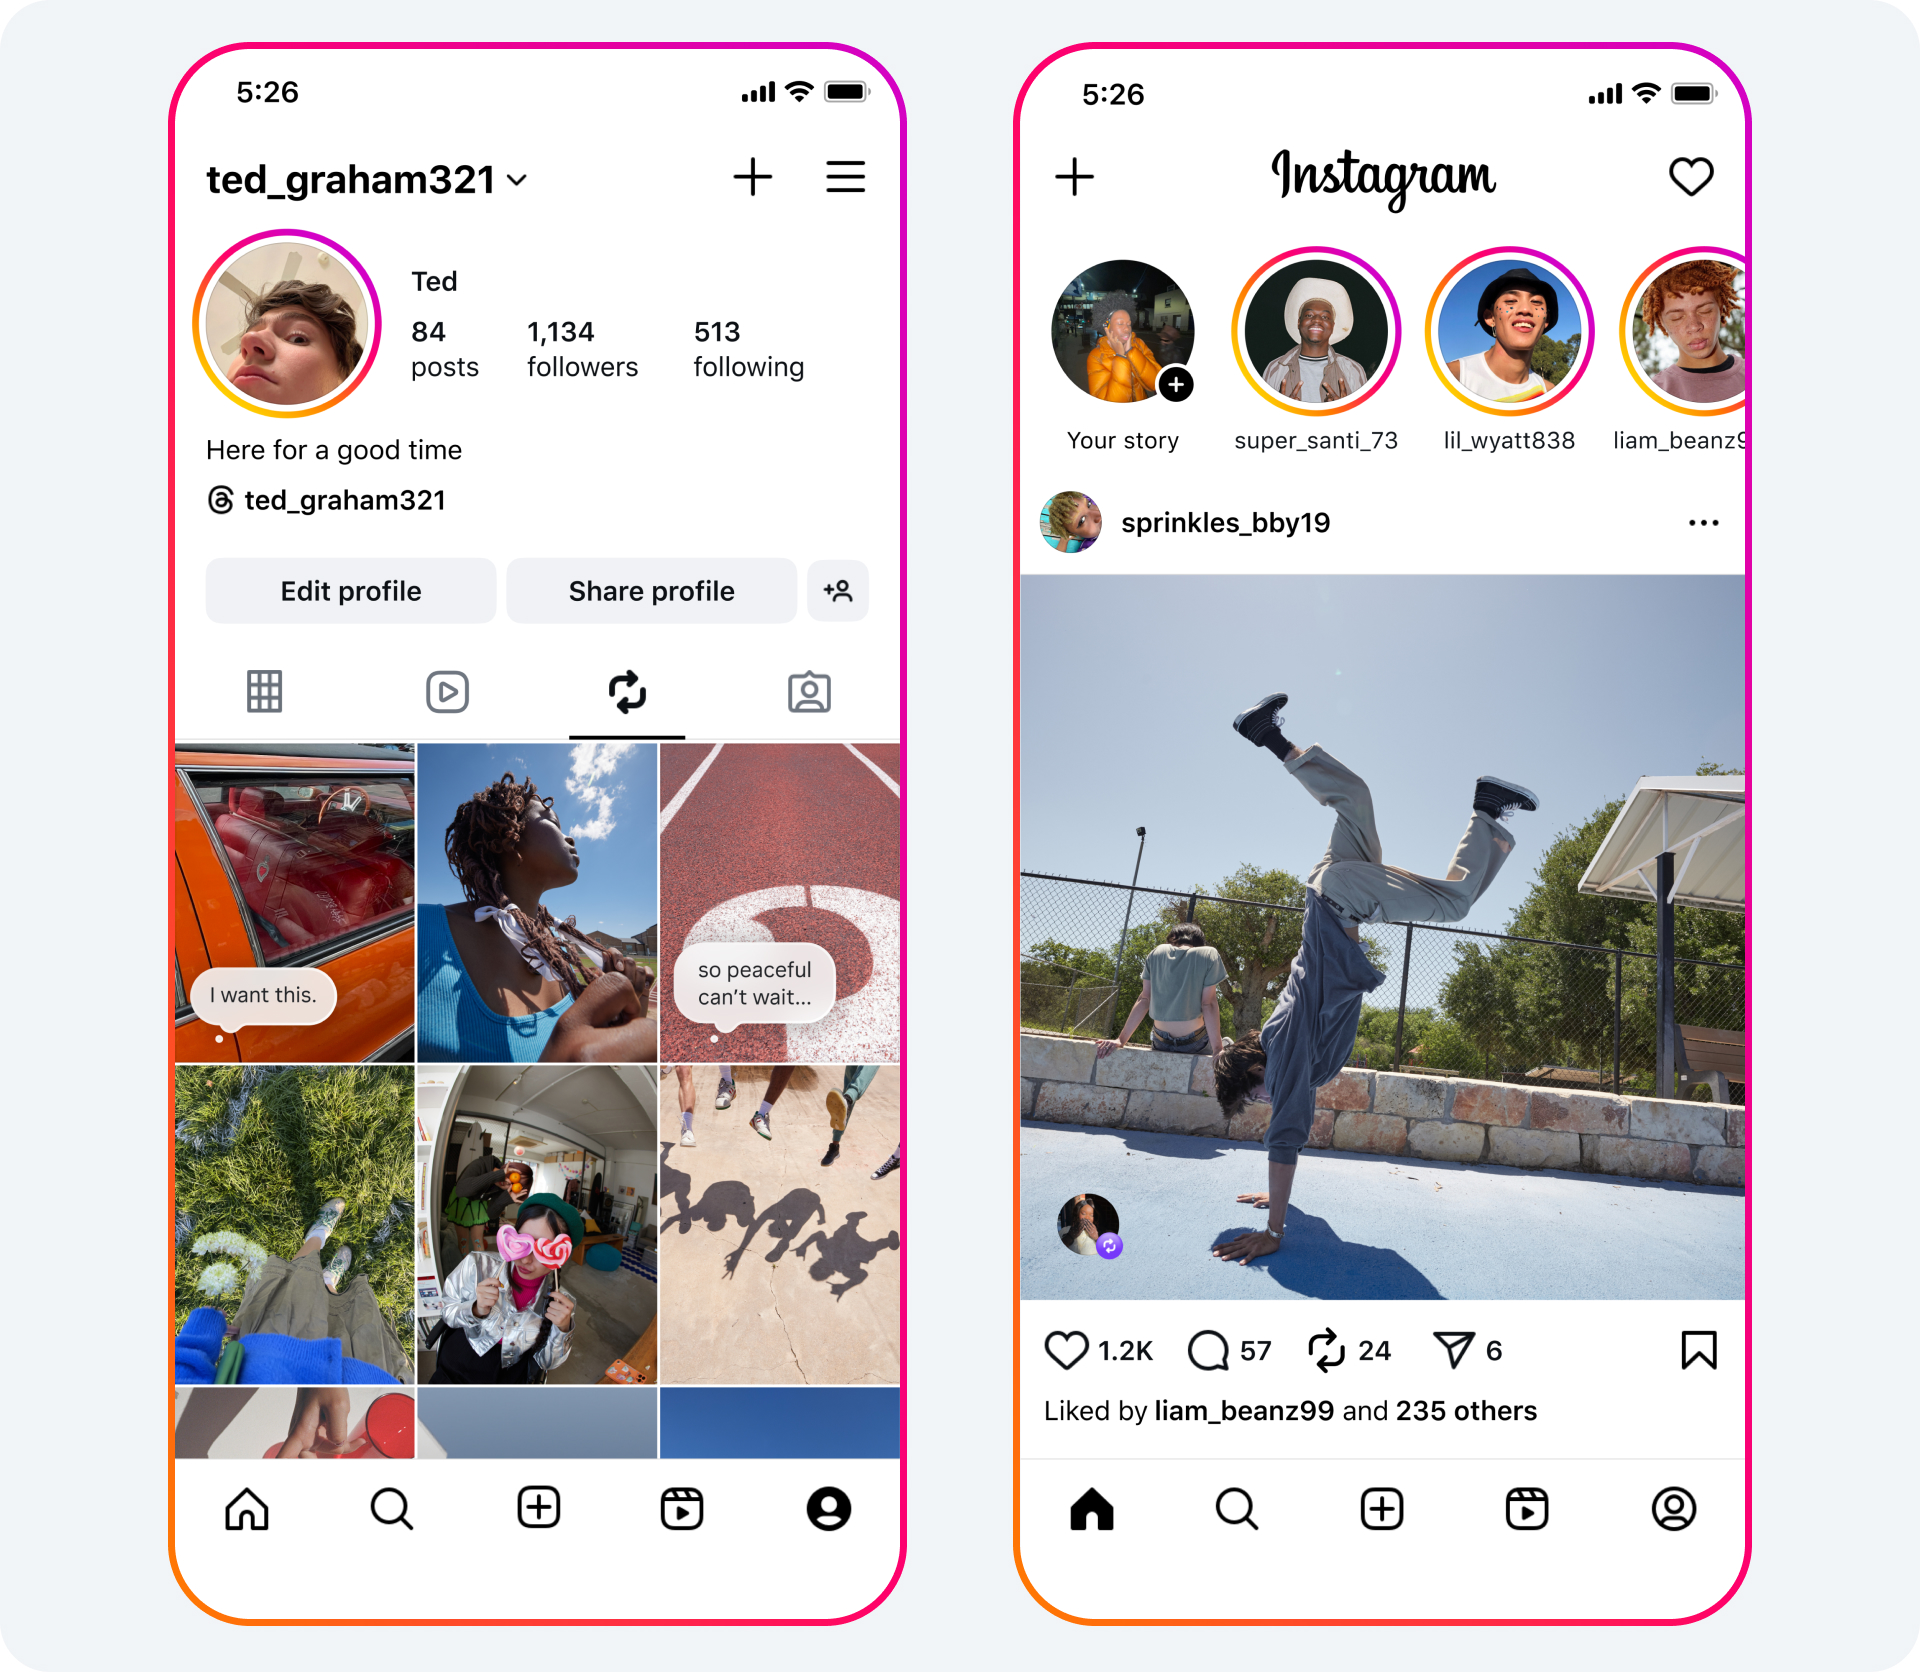
Instagram just launched the Repost feature.
But have you ever stopped to think about how a feature like this is born and evolves until it reaches your app?
In a product with millions of users and a large team behind it, almost nothing is simple. There’s a path, a process, and it can inspire even smaller projects.
Here I’ll walk you through the 10 most common steps in creating a new feature at tech companies that follow modern development best practices.
1. PRD (Product Requirements Document)
This is where it all begins. The Product team defines the problem, the goal, and the proposed solution in a document called a PRD.
The design may or may not be ready by the end of this stage.
In the case of the Repost:
- Why do we need this now?
- What changes in the experience?
- What does success look like?
The proposal is then shared with stakeholders, people directly or indirectly impacted by the feature (engineering, marketing, support, compliance, etc).
2. RFC (Request for Comments)
In this phase, engineering, product, and design discuss together, and an engineer is assigned as the owner of the delivery and writes the RFC: a technical document explaining how the feature will be implemented.
It covers:
- Technical feasibility
- Risks and alternatives
- Proposed architecture
- Impact on existing systems
The document is open for comments and suggestions from all technical areas involved. A solution is proposed along with open questions that still need validation from the team.
After that, the RFC is shared with other stakeholders, who can (and should) comment, suggest improvements, or raise concerns.
3. Preparing for Refinement
With the RFC approved, it’s time to prepare the ground for refinement.
The feature lead organizes everything needed for the deeper technical discussion:
- Creating technical tickets in the project management tool (like Jira, Linear, or similar)
- Highlighting critical points that require collective decisions
- Updated designs, ideally with navigable prototypes
- Identified and aligned dependencies, both internal and external
- Potential spikes (quick technical explorations) may be proposed
This step ensures the refinement doesn’t become an abstract conversation, but rather an objective and productive meeting with supporting materials and a clear scope.
4. Refinement
The refinement is the meeting where engineering, product, and design dive deep into the feature’s execution. This is where the team gets into the technical details and defines, for example:
- Will the feature be launched with a feature flag? i.e., can it be toggled on/off remotely?
- What will be the source of truth? i.e., which service will be responsible for sending feature data to the apps and capturing interactions?
- How will event tracking be done? i.e., what events do we need to measure? Where and how will we collect them?
- Are there technical or performance risks?
- Are there impacts on other teams or products? i.e., external dependencies?
- What will the fallback experience be? i.e., if something goes wrong, how do we revert?
- Are there UX decisions still open?
All these decisions are documented for the next step.
5. ADR (Architecture Decision Record)
Formal documentation of the solution’s architecture.
Created by engineering, it serves as a technical reference and covers:
- The solution’s architecture
- Impacted services and their responsibilities
- Data structure (new fields, tables, endpoints)
- API contracts
- Fallback and rollback strategies
- Technical patterns and guidelines to follow
- What tests will be needed (unit, integration, etc.)
The ADR is especially important in large teams or with multiple squads, as it ensures any technical person can understand how the feature was designed.
6. Development
With PRD, RFC, refinement, and ADR approved, the execution phase begins.
Here, engineers work to implement the feature according to the scope and decisions already defined. During this phase:
- The team implements the agreed-upon decisions
- Design follows closely (to ensure consistency with what was prototyped)
- Product monitors scope, answers questions, and unblocks the team if needed
- Internal documentation is updated when applicable
In parallel, the team already starts thinking about the QA (Quality Assurance) strategy for the next stages.
7. Testing and QA
This is where validation begins for real, and in depth.
The main types of tests applied are:
- Unit: test specific functions or isolated components
- Integration: verify that parts of the system communicate correctly
- UI: check that the interface is correct across different devices
- E2E (end-to-end): simulate complete usage of the feature, as a user would
- Manual: cover specific cases that haven’t been automated yet
The QA team creates test plans, looks for failures, simulates regressions, and documents everything.
8. Product and Design Approval
Now it’s time to find out: does what was implemented match what was envisioned?
Design and product test the feature in the staging environment (an environment that simulates what the end user uses):
- Is the experience smooth?
- Do behaviors match what the prototypes indicated?
- Does the Repost button (for example) behave as expected across all flows?
If anything is off, adjustments are made before launch.
9. Phased Release (Controlled Launch)
With everything approved, the launch begins, but not all at once.
In addition to the feature flag, the famous phased release strategy is used:
- Starts with 1% of the user base
- Moves to 5%, then 10%, and so on
During this time, the team monitors:
- Bugs
- Performance
- Feature engagement
This greatly reduces the risk of launching something with flaws at scale, and allows reverting the feature in time.
10. Monitoring and Global Launch
At the end of the phased release that the team closely monitored, the following are analyzed:
- Usage metrics: are people using the new feature as expected?
- Tracking events: is data arriving correctly?
- User feedback: did questions or rejection come up?
- Errors and crashes: any critical failures or unexpected behavior?
If the data is positive and everything is stable, the team proceeds to the global launch, releasing the feature to 100% of the user base.
From there, it officially becomes part of the product and enters the continuous improvement cycle.
Conclusion
Now you know the step-by-step behind a simple button.
Nothing is as simple as it seems.
But with process, collaboration, and good decisions… ideas become code. Code becomes product. And product becomes impact!